> ## Documentation Index
> Fetch the complete documentation index at: https://anaconda.com/docs/llms.txt
> Use this file to discover all available pages before exploring further.
# Tool servers
export const DefinitionDescription = ({children}) => {children};
export const DefinitionTerm = ({children}) => {children};
export const DefinitionList = ({children}) => {children}
;
A tool server is an MCP server that exposes Python tools. Unlike an agent, a tool server has no model, system prompt, or conversation history. Use tool servers to share a set of tools across multiple agents or to make them available to external MCP-compatible applications.
Once a tool server is running, it exposes an MCP endpoint you can register as a [custom MCP server](/docs/anaconda-desktop/agent-studio/plugins#registering-an-mcp-server) to connect it to your agents.
## Creating a tool server
1. Select **Tool Servers** from the left-hand navigation.
2. Click **Create**.
3. On the Create Tool Server page, click **Tool Server Name** and enter a name.
4. (Optional) Enter a **Description** of what the tool server exposes.
5. (Optional) Configure the **Sandbox**. See [Sandbox](#sandbox) for details.
6. Click **Save**.
7. Add Python tools under **Python Tools**. For details, see [Python tools](#python-tools).
You must **Save** your tool server before adding Python tools.
8. Click **Start** to run the tool server. The server's status changes to **Running** and the **Connect** button becomes available.
You can also start a tool server from the **Tool Servers** page by hovering over its card and clicking **Start**.
## Importing a tool server
To import a tool server from an existing file or URL:
1. Select **Tool Servers** from the left-hand navigation.
2. Click **Import** in the upper-right corner and choose an option:
* **From file**: Select a tool server file from your machine.
* **From URL**: Enter a URL to fetch the tool server configuration.
## Sandbox
The sandbox runs your tool server inside a Docker container, isolating it from your local system. The tool server cannot access your filesystem or network unless you explicitly configure folder mounts and networking.
Running a tool server in a sandbox requires Docker Desktop installed on your machine.
To configure the sandbox:
1. Turn on the **Sandbox** toggle.
2. Select **Settings** to open the Sandbox Settings dialog.
3. Select a network mode from the **Network** dropdown:
* **Outbound** (default): The tool server can make outgoing network requests. Agent Studio publishes the container's port to localhost so you can connect to it.
* **Isolated**: No network access. The tool server cannot reach external services or be reached from the host.
* **Host network**: The tool server shares the host's network namespace directly.
4. (Optional) Set **CPUs** and **Memory** limits for the container.
5. (Optional) Add folder mounts to give the tool server access to specific directories on your machine. Click **Add mount**, then configure:
* **Host path**: The directory on your machine to share with the container. Click the folder icon to browse your file system.
* **Sandbox path**: The location inside the container where the directory is mounted.
* **Permissions**: Choose **R** (Read-only) or **RW** (Read/write).
To remove a folder mount, click **Remove**.
6. Repeat the previous step to add as many folder mounts as your tool server requires.
7. Click **Done**.
If your Python tools make calls to `127.0.0.1` or `localhost`, those addresses will not resolve inside the container. Use `host.docker.internal` instead to reach services running on your host machine.
## Python tools
Python tools are custom functions that your tool server exposes. Tools are organized into Python files, which group related `@tool` functions.
### Creating a Python tool file
1. Click **Add Tool** beside **Python Tools**.
2. In the Create File dialog, enter a name using letters, numbers, and underscores. The name must start with a letter or underscore.
3. Click **Create**.
Agent Studio opens your default editor and creates the file with a sample tool function:
```python expandable theme={null}
"""my_tool tool module."""
from anaconda_agent_runtime.tools import tool
@tool
def my_tool(query: str) -> str:
"""Describe what this tool does.
Args:
query: The input to process.
Returns:
The result of the operation.
"""
return f"Result for: {query}"
```
4. Customize the generated function with your tool's logic.
5. Save the file.
The file uses the function name as the tool name, argument names and type hints to build the tool's input schema, and the docstring as the tool's description.
Write a clear docstring that describes what the tool does, what it accepts, and what it returns.
To remove a Python tool, click , then click **Delete** to delete the file.
## Deleting a tool server
1. Select **Tool Servers** from the left-hand navigation.
2. Click on the tool server's card.
3. Select **Delete** to remove it.
## Connecting to a tool server
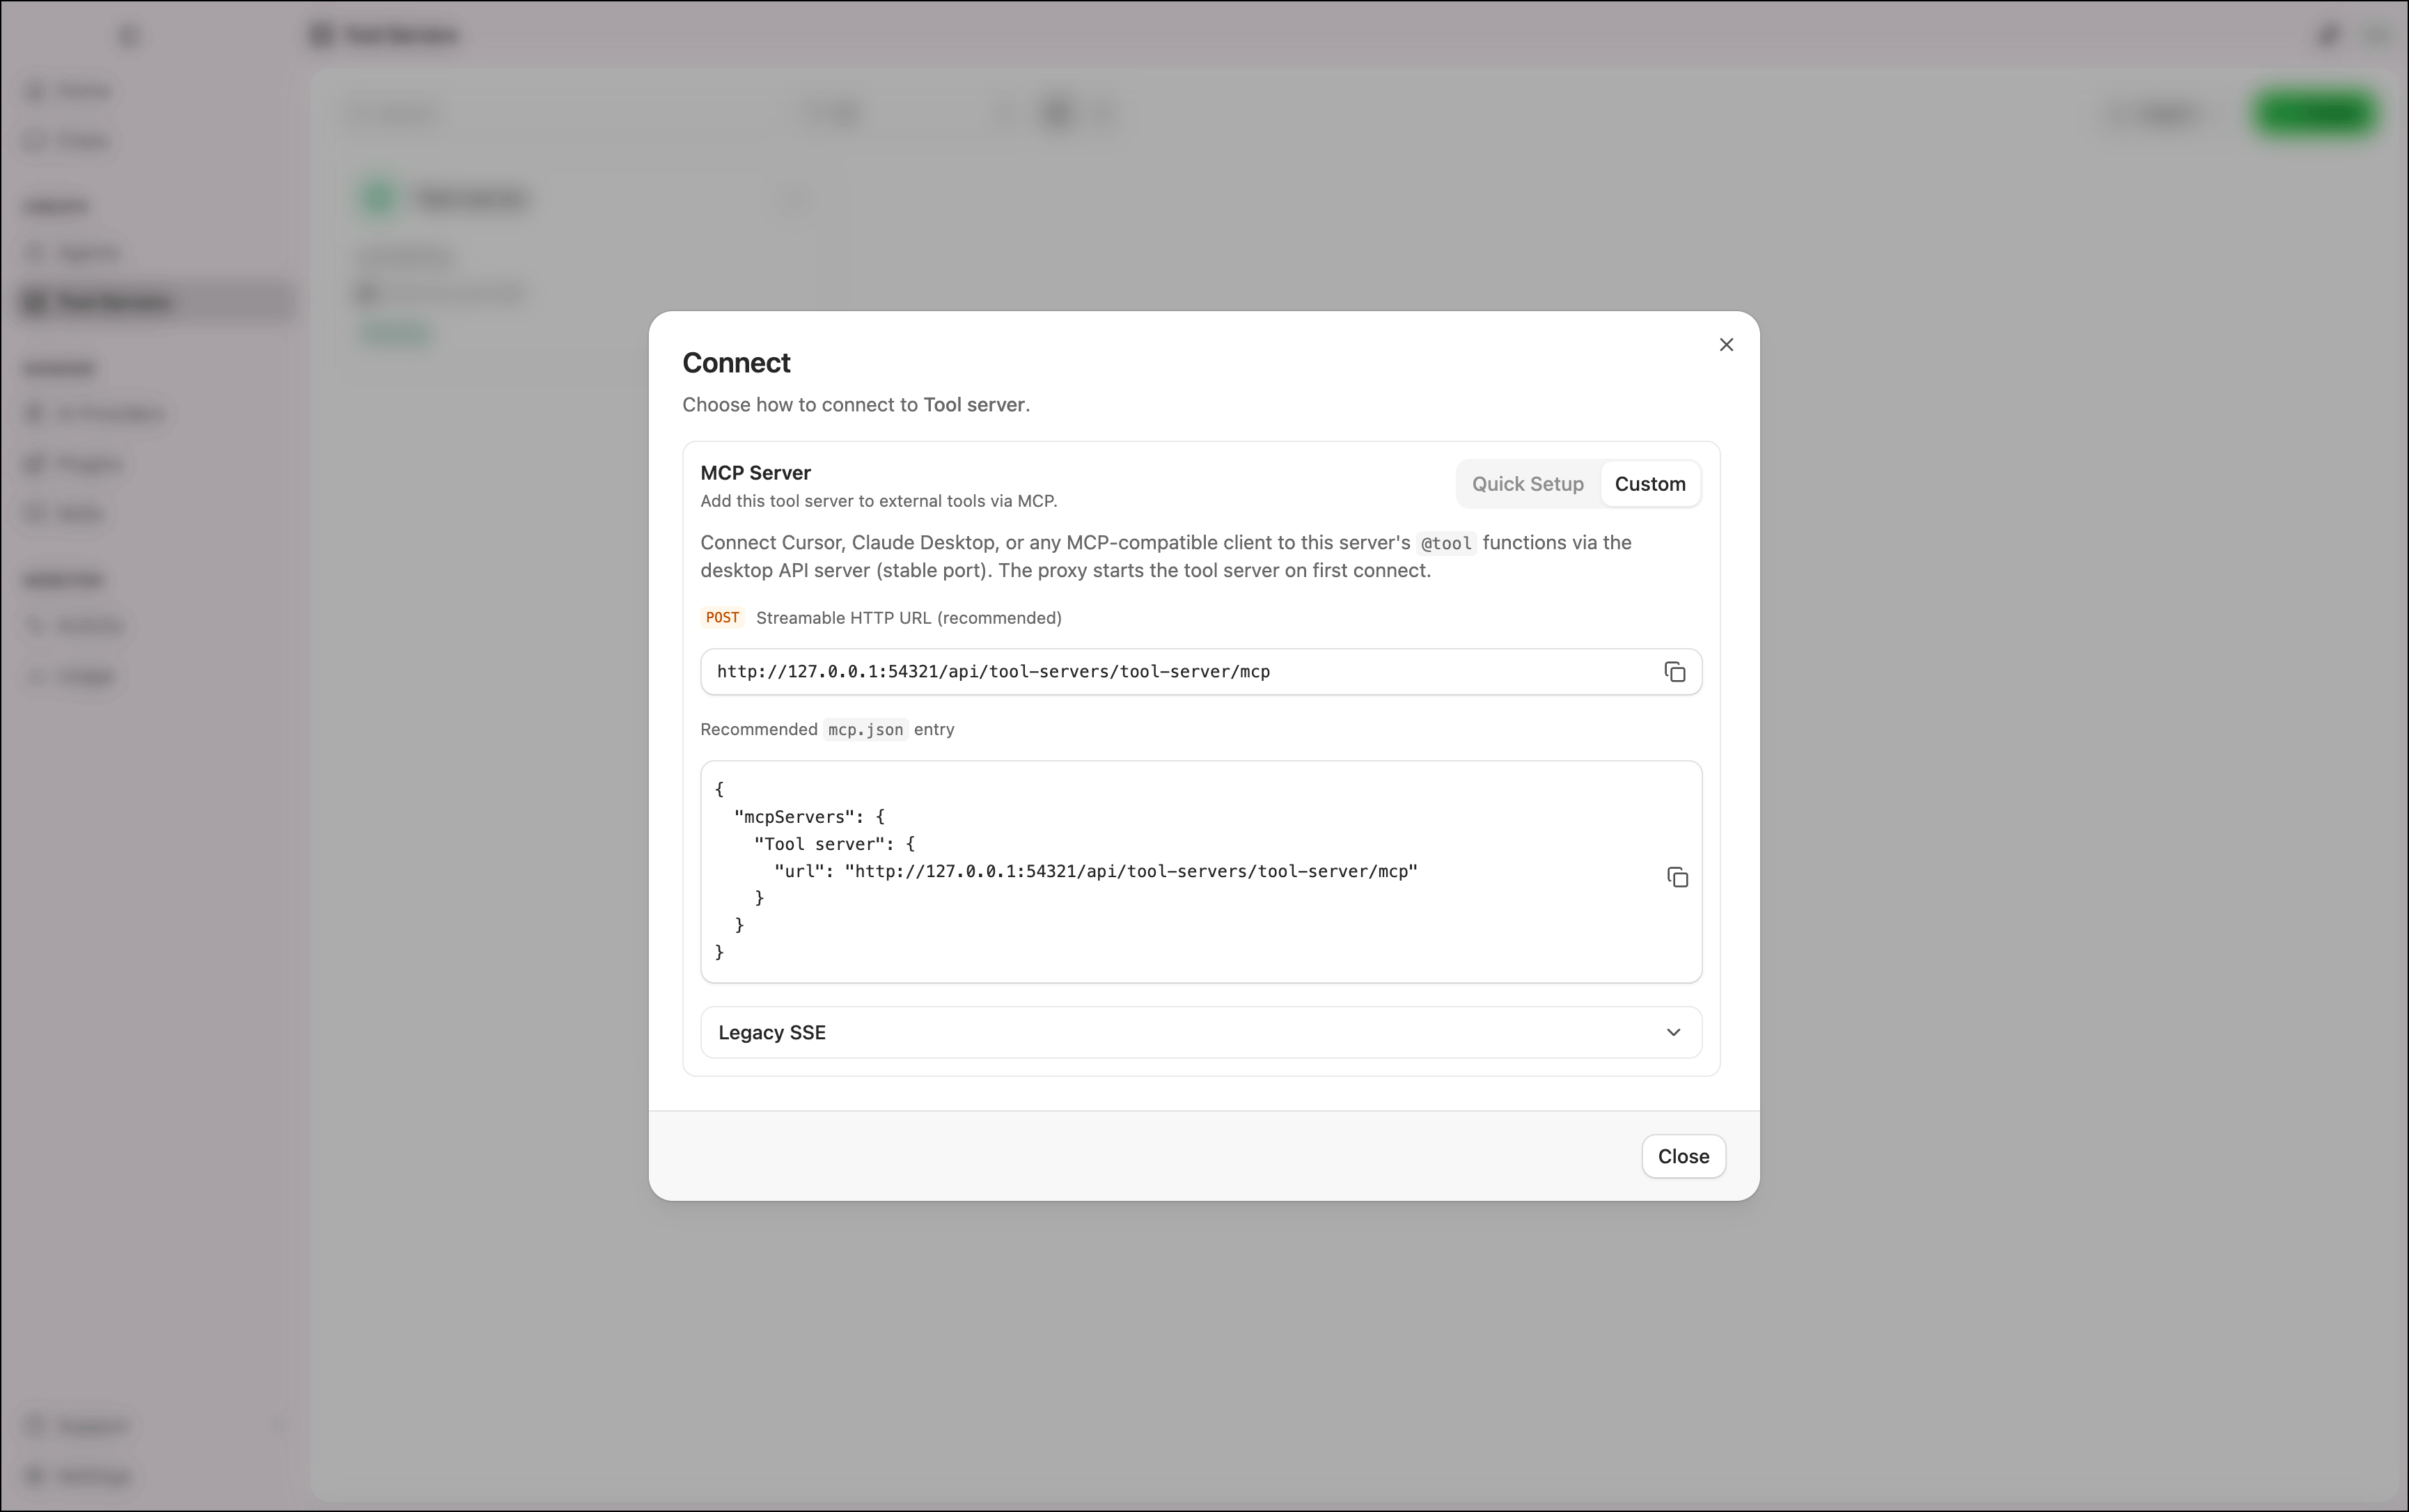
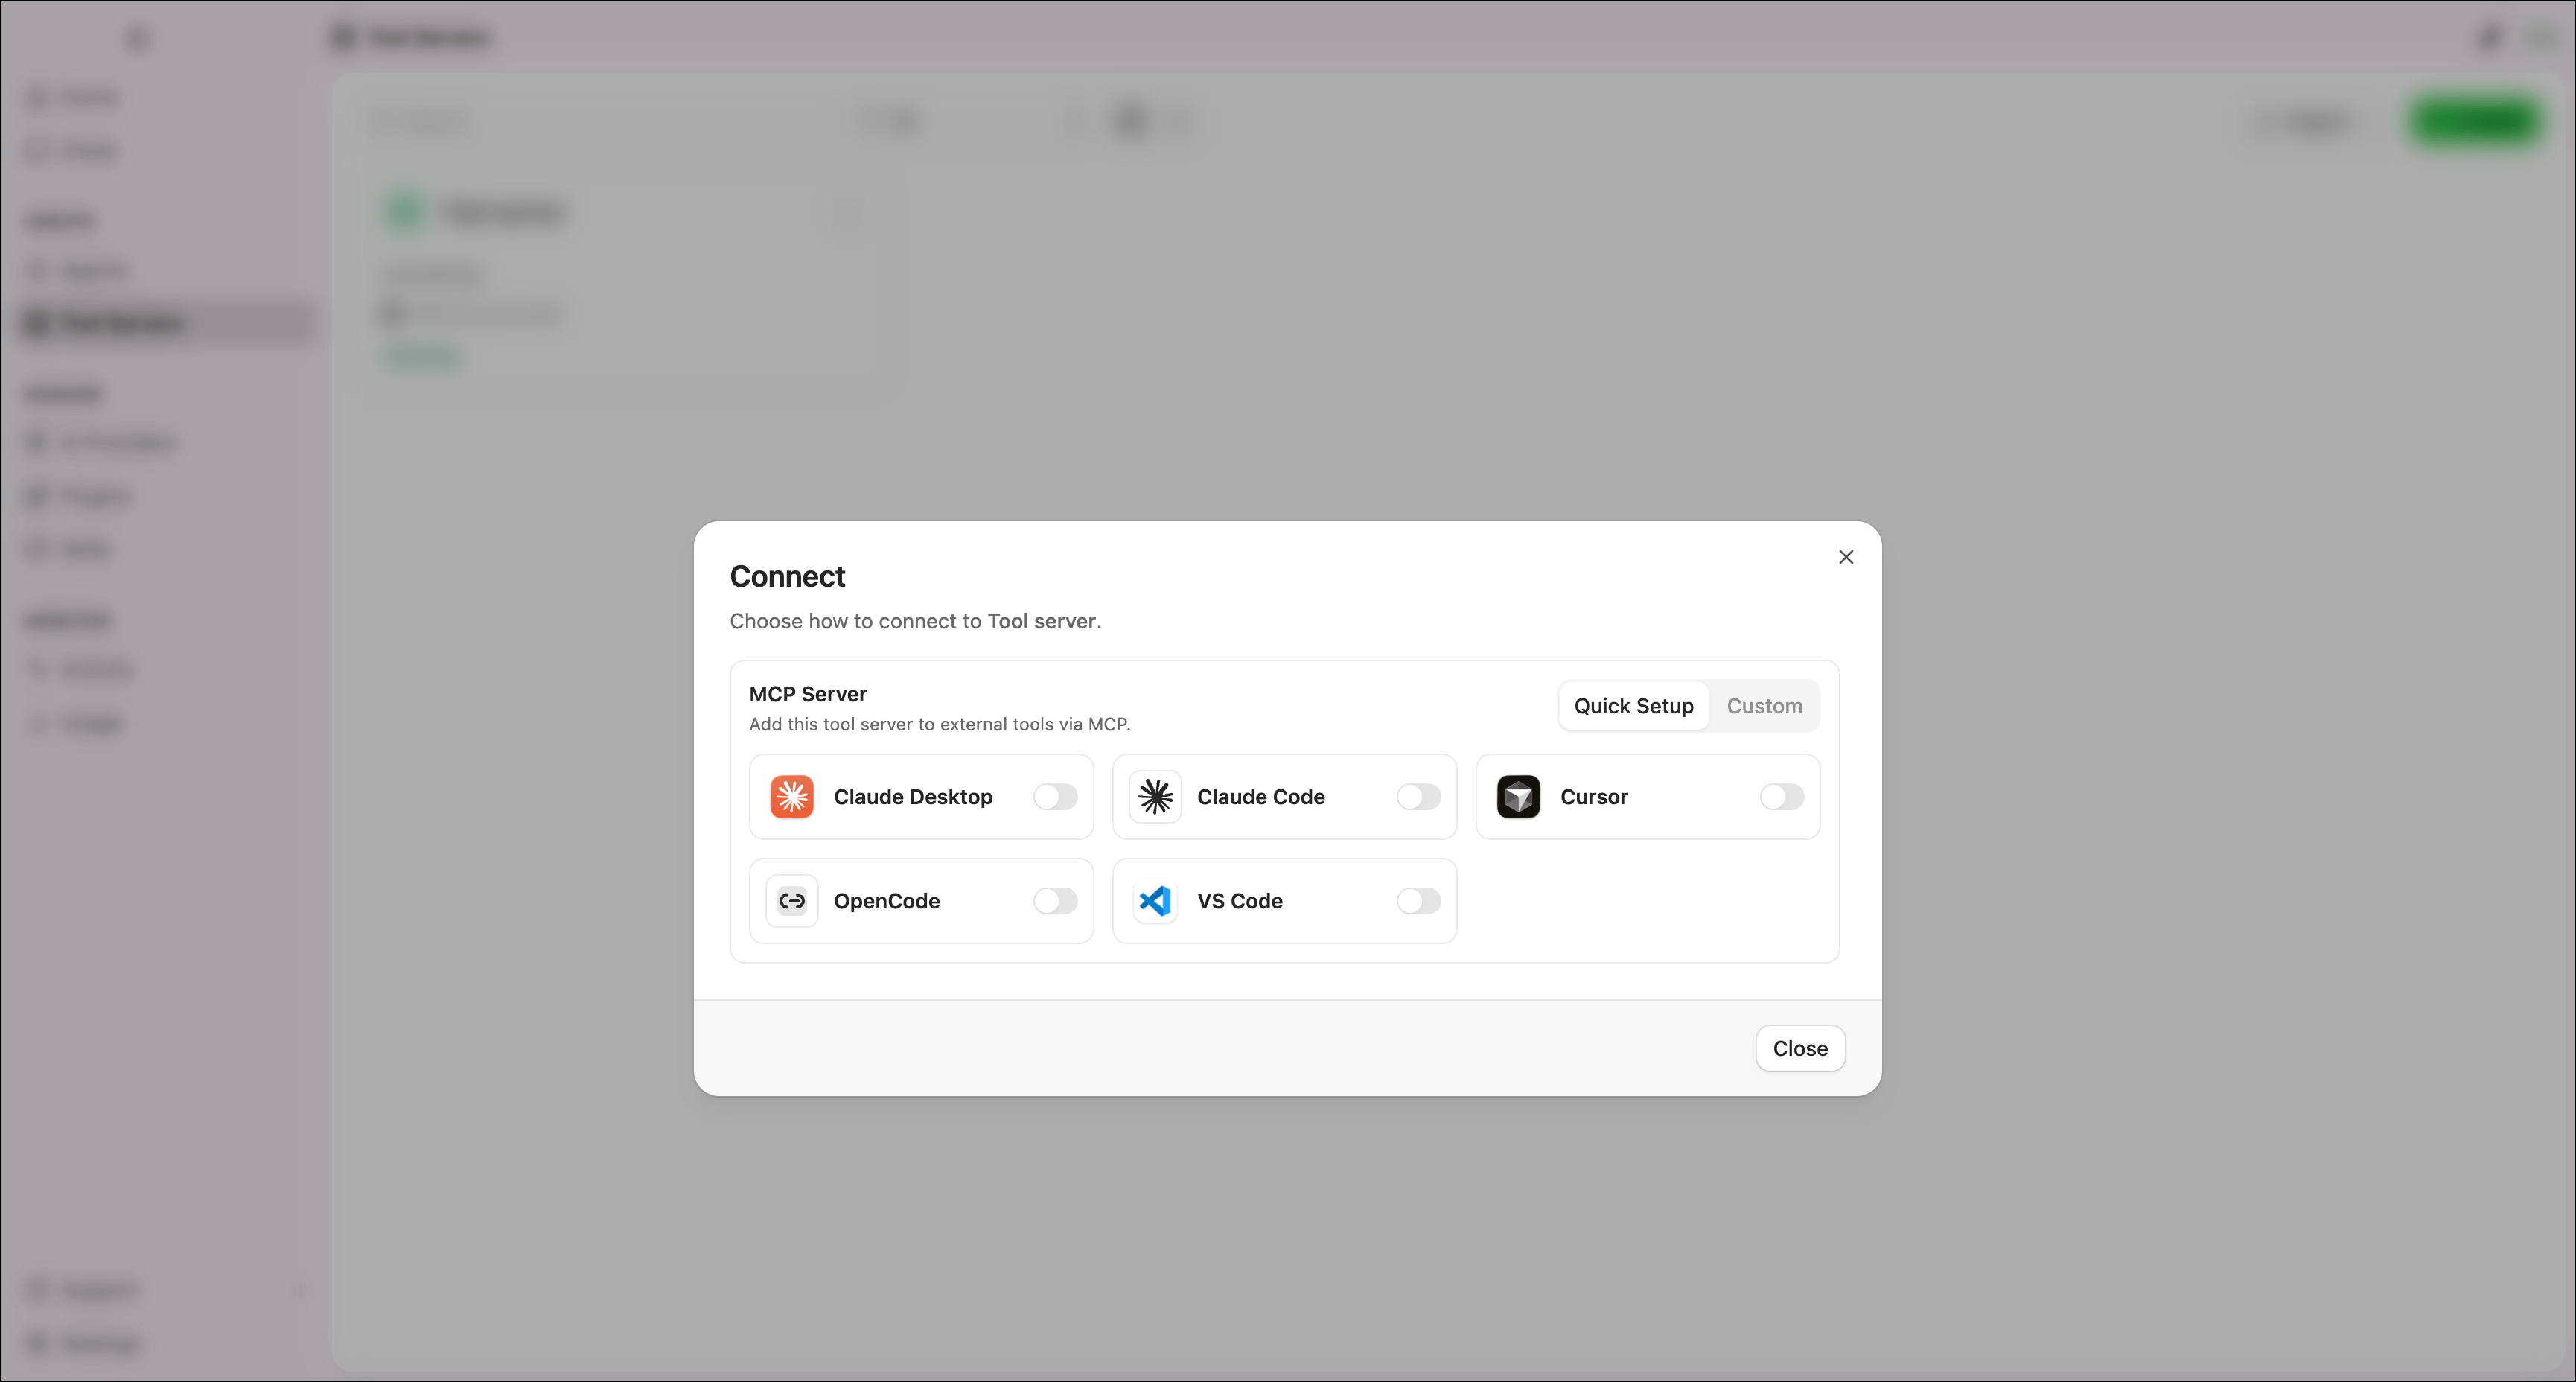
Click **Connect** on the tool server's editor page to open the Connect dialog. Use **Quick Setup** to configure supported tools automatically, or **Custom** to copy the connection details manually.
Turn on the toggle beside each tool to register the tool server as an MCP server in that tool's configuration. Supported tools include Claude Desktop, Claude Code, Cursor, OpenCode, and VS Code.
 The Custom tab provides two connection options:
Streamable HTTP URL (recommended)
The tool server's MCP endpoint URL, plus a ready-to-paste `mcp.json` entry. Use this for any MCP-compatible client that supports Streamable HTTP, including Claude Code, Cursor, and VS Code. The connection is proxied through the desktop API server on a stable port, and the tool server starts automatically on first connect.
Legacy SSE
A direct SSE endpoint URL and `mcp.json` entry for Claude Desktop and other clients that use SSE-based MCP. Also includes an `mcp-remote` configuration for Cursor — use this only if native Streamable HTTP is not supported.
The Custom tab provides two connection options:
Streamable HTTP URL (recommended)
The tool server's MCP endpoint URL, plus a ready-to-paste `mcp.json` entry. Use this for any MCP-compatible client that supports Streamable HTTP, including Claude Code, Cursor, and VS Code. The connection is proxied through the desktop API server on a stable port, and the tool server starts automatically on first connect.
Legacy SSE
A direct SSE endpoint URL and `mcp.json` entry for Claude Desktop and other clients that use SSE-based MCP. Also includes an `mcp-remote` configuration for Cursor — use this only if native Streamable HTTP is not supported.